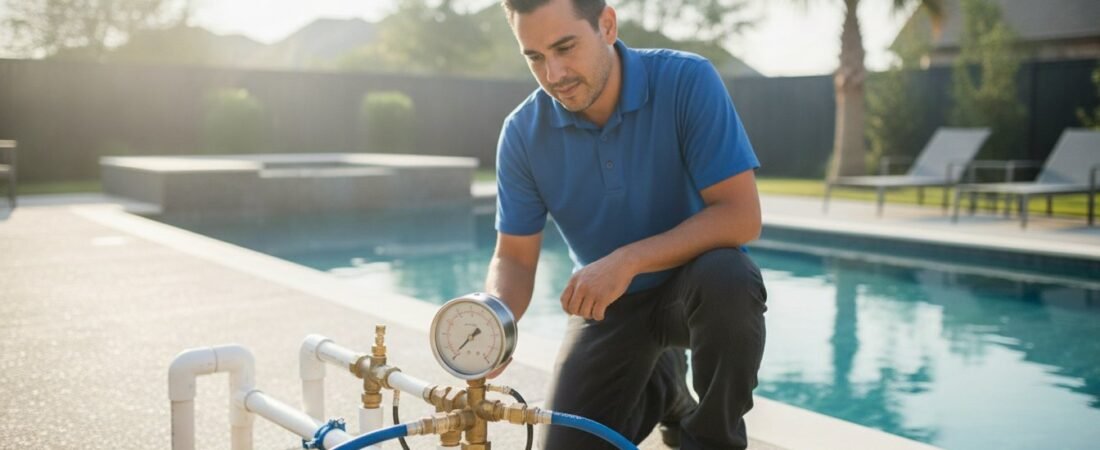
The most expensive mistake a pool owner can make isn’t ignoring a leak; it’s digging in the wrong place. It is incredibly frustrating to watch your water level drop day after day while worrying that shifting local soil has finally snapped an underground pipe. You want answers, but the fear of unnecessary excavation costs often leads to paralysis. It’s a heavy burden for any homeowner who values the long-term stability of their property.
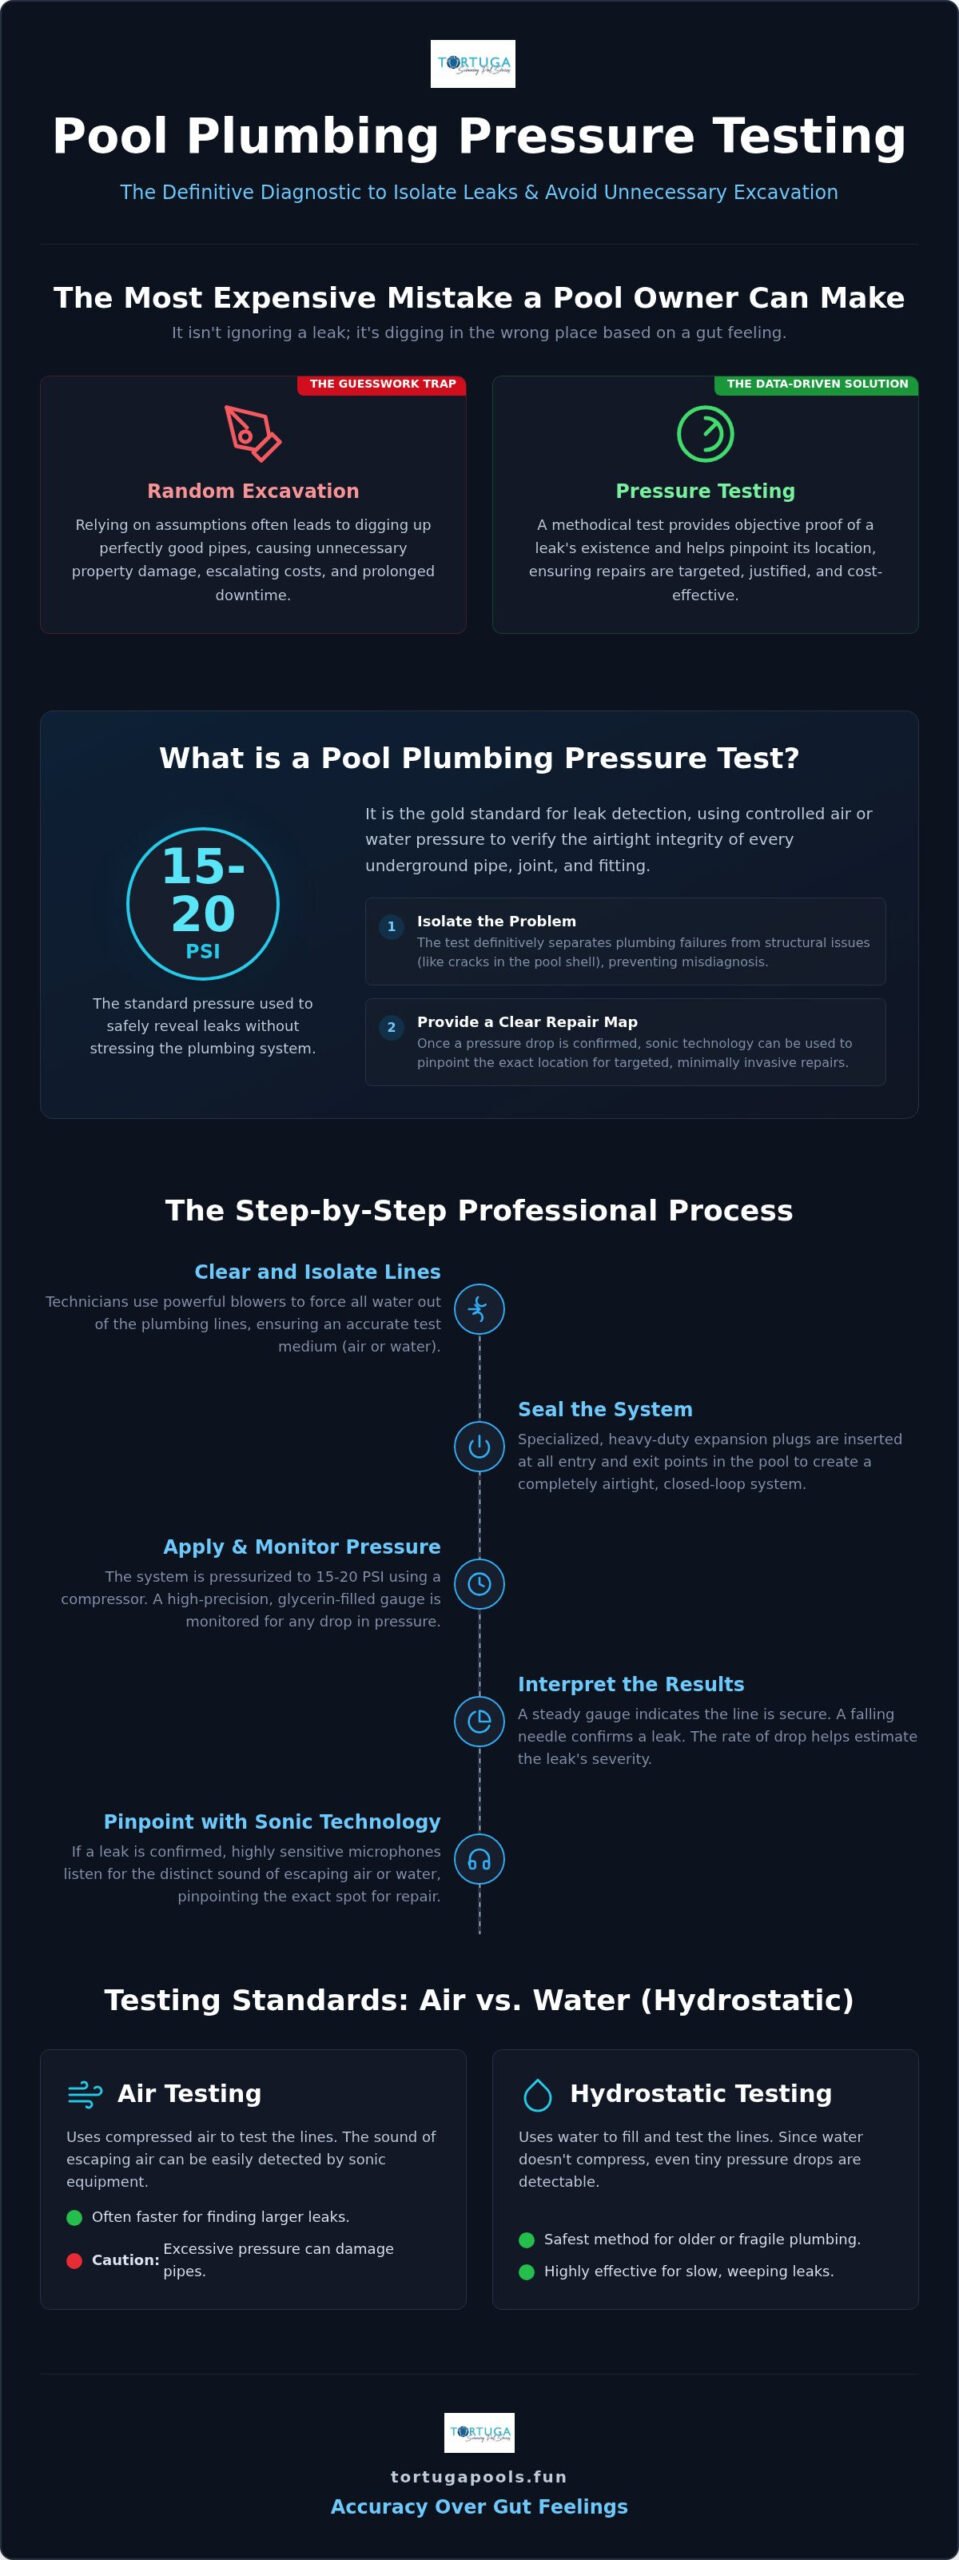
A professional pool plumbing pressure test provides the objective proof you need to move forward with confidence. This methodical process uses specialized equipment to verify the integrity of your lines, typically testing at a steady 15 to 20 PSI to ensure every joint and fitting is secure. This guide will show you how a disciplined pressure test isolates plumbing leaks from structural issues, protecting your pool and your family’s investment.
You’ll learn the exact steps a technician takes to verify a leak, the difference between air and water testing, and how to transition from uncertainty to a clear repair plan. We believe in accuracy over gut feelings. This approach ensures that every repair decision is backed by data rather than guesswork, providing a steady hand to guide your maintenance.
Key Takeaways
- Understand how a professional pool plumbing pressure test serves as the definitive diagnostic tool to differentiate between structural cracks and underground pipe failures.
- Learn the technical differences between air and water testing and why maintaining a stable PSI is the only way to verify the airtight integrity of your lines.
- Identify the limitations of common DIY troubleshooting methods and see why professional-grade equipment is required to eliminate guesswork and avoid unnecessary excavation.
- Follow the disciplined sequence of clearing lines and sealing the system with specialized expansion plugs to protect your property from further damage.
- Discover how technicians use sonic technology to pinpoint the exact location of a pressure drop, creating a precise map for targeted, cost-effective repairs.
What is a Pool Pressure Test and Why is it Necessary?
A pool plumbing pressure test is a diagnostic procedure that uses air or water to verify the airtight integrity of underground lines. It is the gold standard for accuracy in leak detection. While a visual inspection might spot a crack in the tile, it cannot see the plumbing buried beneath the concrete deck or several feet of soil. This test serves as the primary tool in the broader leak detection process, transforming a vague suspicion of water loss into a verified technical fact. It provides a clear map for repair, ensuring that any necessary excavation is targeted and justified.
In the Houston area, the local environment makes this verification particularly vital. Our expansive clay soil is notorious for shifting during periods of heavy rain or extreme drought. When the ground moves, the rigid PVC pipes of your pool’s circulatory system can fracture or pull away from fittings. This method often involves a Hydrostatic test, which uses water to identify even the smallest pressure drops. A professional test protects you from the expensive mistake of digging up your yard based on a “gut feeling.” It is a protective measure for your property and your peace of mind.
The Process of Elimination: Plumbing vs. Structure
The primary goal is to isolate the pool shell from its plumbing system. We look at the tile, plaster, and light niches first. If those are sound, the focus shifts to the pipes. Verifying the plumbing before any excavation begins saves time and prevents unnecessary property damage. At Tortuga Pools, we follow a methodical sequence. We rule out equipment leaks at the pump and filter before testing the underground lines. This step-by-step discipline ensures we don’t overlook simple fixes while searching for complex problems. Isolate the shell. Test the lines. Confirm the results.
When to Schedule a Pressure Test
Timing is everything. If you notice air bubbles streaming from the return lines or a pump that refuses to prime, you likely have a suction-side leak. Another red flag is water loss that exceeds the standard evaporation rate for the Houston climate. During the hot summer months, evaporation is expected, but disappearing inches of water usually signal a deeper issue. We also recommend a pool plumbing pressure test as part of pre-purchase inspections for new homeowners in Katy and Fulshear. It offers peace of mind. You shouldn’t inherit someone else’s plumbing problems without a clear understanding of the system’s health.
The Science of Pressure: Air vs. Water Testing Standards
Precision is the foundation of a successful pool plumbing pressure test. It is not a matter of simply pumping air into a pipe and hoping for the best. Instead, it is a controlled scientific measurement. For most residential PVC systems, we maintain a standard of 15 to 20 PSI. This range is sufficient to reveal a leak without compromising the integrity of the plumbing. Some believe that applying more pressure yields faster results, but that is a dangerous misconception. Excessive pressure can turn a minor hairline fracture into a catastrophic pipe burst, especially in older systems where the plastic has become brittle due to years of chemical exposure and ground stress.
To achieve an accurate reading, we rely on specialized equipment rather than hardware store alternatives. This includes glycerin-filled gauges that dampen needle vibration and heavy duty expansion plugs designed to create a true airtight seal at the pool wall. While pool systems operate at lower pressures than industrial lines, we still follow the core principles found in professional pipeline pressure testing standards to ensure your property remains protected throughout the diagnostic process.
Hydrostatic Testing: The Gentle Verification
Hydrostatic testing uses water to verify the system. Because water does not compress, this method is often the safest choice for older or fragile plumbing. It is particularly effective at identifying slow, weeping leaks that might not create a loud enough sound for acoustic sensors. However, the Texas climate introduces unique variables. Temperature fluctuations in Katy and Houston can cause water to expand or contract. A steady hand is required to distinguish between a genuine pressure drop and a minor shift caused by the afternoon sun. If you suspect a slow decline in your water level, a professional leak detection can provide the technical clarity you need.
Pneumatic Testing: Finding the “Hiss”
Pneumatic testing involves the use of compressed air. This method is preferred when we need to pinpoint the exact location of a break. As air escapes a fractured pipe underground, it creates a distinct “hiss” or gurgling sound that can be picked up by specialized microphones. Safety is paramount here. Compressed air stores a significant amount of energy. If a plug is not seated correctly, it can become a dangerous projectile. We follow strict protocols to clear the area and monitor the gauges with constant attention. Accuracy requires patience. Speed is never prioritized over safety.
DIY Troubleshooting vs. Professional Pressure Testing
Observation is a fine starting point for any homeowner. When you notice the water line receding faster than usual, your first instinct is likely to grab a bottle of dye or a bucket to confirm your suspicions. These initial steps are helpful for identifying surface-level issues, such as a visible crack in the skimmer throat or a leaking pump seal. However, these methods cannot peer through the earth to inspect the integrity of your circulatory system. While some online forums suggest building a DIY tester for a few dollars, the risks often outweigh the savings. A pool plumbing pressure test requires a level of precision that hardware store equipment simply cannot provide.
The primary danger of a DIY approach is the lack of accurate measurement. Consumer-grade gauges are often uncalibrated and prone to sticking. If you inadvertently apply too much air to a line weakened by Katy’s shifting clay soil, you risk turning a minor repair into a major excavation project. Professional glycerin-filled gauges are designed to provide steady, vibration-free readings, allowing a technician to see a pressure drop of even a single pound. This accuracy is the difference between a targeted patch and a full line replacement.
The Bucket Test: Your First Step
The bucket test is a reliable way to determine if your water loss is caused by a leak or natural evaporation. This is especially important in the heavy Houston humidity, where evaporation rates can be deceptive. Place a bucket on the first or second pool step and fill it so the water level inside matches the pool level outside. After 24 hours, compare the two. If the pool level has dropped significantly lower than the bucket level, you have a leak. For more details on managing your pool’s environment, see our Weekly Pool Maintenance in Katy, TX: Homeowner Guide. If the test confirms a leak, it’s time for a professional diagnostic.
Why Professional Verification Wins
A professional pool plumbing pressure test offers capabilities that go far beyond a simple pressure check. Technicians use specialized sonic leak detection equipment to listen for the exact location of a break while the line is under pressure. This allows us to isolate suction lines, return lines, and cleaner lines independently. By narrowing the search to a specific run of pipe, we minimize the impact on your landscaping. Furthermore, a professional report provides the documented proof required for insurance claims or home sale disclosures. It replaces “guessing” with a certified repair map, ensuring your property remains protected and your repair budget is used efficiently.
The Methodical Step-by-Step Pressure Test Process
A professional pool plumbing pressure test follows a disciplined sequence to ensure nothing is left to guesswork. The process begins by shutting down the entire filtration system. We clear the lines of water using compressed air; this ensures we are measuring the integrity of the pipe volume itself rather than just the water column. Once the lines are clear, we seal the system using specialized expansion plugs at the pool wall. These are mechanical tools designed to create a true airtight seal. They are far more reliable than standard rubber stoppers.
Applying the pressure requires patience and a steady hand. We increase the pressure slowly to reach the target range of 15 to 20 PSI. A sudden surge can stress aged fittings, so a gradual approach is essential for safety. Once the target is reached, we monitor the glycerin-filled gauge with total focus. It is important to distinguish between a “drop” and a “fluctuation.” In our local climate, the afternoon sun can heat the air inside the pipes, causing a minor rise or fall in pressure. A technician knows how to account for these thermal shifts, while a steady, persistent downward movement confirms a verified leak.
Isolating the Suction Side
The suction side includes the skimmer and main drain lines. These pipes pull water from the pool toward the pump. Common symptoms of a suction leak include a pump basket filled with air or return jets that “spit” bubbles into the pool. These signs are often confused with equipment failure. If you are noticing these issues, you might also want to review our guide on Signs of a Failing Pool Pump. By isolating these lines, we can determine if the problem is a cracked skimmer pipe or a mechanical seal issue at the equipment pad.
Verifying the Return Side
The return side consists of the lines that carry filtered, chemically balanced water back to the pool. In older Fulshear pools, we often find failure points at T-junctions or near light niches where the plumbing is under the most stress. We look for a specific “Hold Time” during this phase. The line must maintain its PSI without any movement for at least 15 to 20 minutes to be certified “tight.” While construction standards for new pools may require longer windows, a high-precision service test provides immediate verification of the system’s health. If you suspect your pool is losing water, schedule a methodical leak detection to get a clear repair plan.
Interpreting Results and Planning Your Next Steps
A failed pool plumbing pressure test is unmistakable on a professional gauge. When the system is sound, the needle remains fixed, showing no movement over the required hold time. In a compromised system, the needle drops with a steady, relentless pull. This isn’t a minor fluctuation caused by the sun; it is the objective proof that air or water is escaping through a fracture. Once we verify this pressure drop, we don’t start digging blindly. Instead, we introduce a specific air and water mixture to create an audible “gurgle” underground. By using high-sensitivity sonic microphones, we can pinpoint the exact location of the break through concrete or soil. This precision ensures your repair is targeted and efficient.
The cause of these failures in the Katy and Houston area is almost always rooted in our local geology. Our expansive clay soil acts like a slow-moving vice. It swells during our heavy rain seasons and shrinks during summer droughts. This constant “heaving” exerts immense stress on rigid PVC, often resulting in clean shears at the joints or 90-degree elbows. Understanding this environmental context is vital for creating a repair plan that lasts. We don’t just fix the pipe; we address the stability of the surrounding ground to prevent a repeat failure.
Localized Repair vs. Full Line Replacement
Deciding between a single patch and a full line replacement depends on the condition of the pipe. If the pool plumbing pressure test reveals a single shear in an otherwise healthy line, a localized repair is often sufficient. However, if the PVC has become brittle or if multiple leaks are detected, a full new run of pipe is the only way to ensure long-term stability. We prioritize the use of high-quality Schedule 40 PVC and proper bedding materials, such as sand or pea gravel, to cushion the new lines against Houston’s shifting clay. For a detailed breakdown of what to expect during this process, you can consult our guide on Pool Leak Detection Cost in Katy, TX.
The Tortuga Pools Approach to Recovery
Our “Steady Hand” philosophy means we never rush the transition from diagnosis to fix. We treat your property with the same diligence we would our own. After the repair is complete, we don’t simply backfill the trench and leave. We perform a final verification pressure test to ensure the new connection is 100% airtight. This final step provides you with the documented confidence that the problem is truly resolved. We also check your equipment balance post-repair to ensure your pump and filter are operating at peak efficiency. It’s a methodical, step-by-step recovery designed for the long-term health of your pool.
Restore Stability to Your Backyard Oasis
Identifying a leak shouldn’t be a source of constant anxiety for your family. By utilizing a pool plumbing pressure test, you move from frustrating uncertainty to a clear, data-driven repair map. This methodical approach ensures that every excavation is justified and every repair is designed for longevity. We’ve explored how isolating suction and return lines protects your home from the shifting clay soils found throughout the Katy and Fulshear areas. Precision matters because accuracy is the difference between a temporary fix and long-term endurance.
As local experts, Tortuga Pools provides the steady hand needed for a methodical, step-by-step verification of your entire system. Whether you require a routine diagnostic or emergency pool repair, our team is committed to neighborly accountability and the highest technical standards. Don’t let disappearing water or air in your lines compromise your property’s value. Schedule a Methodical Leak Diagnosis with Tortuga Pools today. You deserve the peace of mind that comes with a job done correctly the first time. We’re here to help you protect what matters most.
Frequently Asked Questions
How long does a pool plumbing pressure test take?
A standard professional test typically takes between 1.5 and 3 hours to complete correctly. This window allows our technicians to clear the lines, set specialized expansion plugs, and monitor the pressure gauges for a sufficient hold time. Complex systems with multiple spas, waterfalls, or dedicated cleaner lines may require additional time. We prioritize a steady and unhurried pace to ensure the results are accurate and reproducible for your repair plan.
Will a pressure test damage my old pool pipes?
Our professional testing process is designed to be safe for aged systems. We use a disciplined PSI range of 15 to 20, which is sufficient to identify leaks without over-pressurizing brittle PVC. While we can’t guarantee a pipe won’t fail if it’s already on the verge of collapse, our methodical approach minimizes risk by avoiding the high-pressure surges that often lead to pipe bursts in older Houston pools.
Can a pressure test find a leak in the pool liner or plaster?
No, a pressure test specifically verifies the integrity of the underground plumbing lines. It does not detect leaks in the pool shell, tile, or plaster. However, it is a vital part of the process of elimination. By confirming the plumbing is airtight, we can confidently pivot our focus to structural issues or fittings like light niches and main drains. This ensures we don’t waste time on plumbing if the shell is the problem.
How much does a professional pressure test cost in the Katy area?
The cost of a pool plumbing pressure test in the Katy and Fulshear area depends on the number of lines and the overall complexity of your pool. While we avoid providing generic estimates without seeing your specific setup, this service is a protective measure for your property. It replaces guesswork with technical verification, ensuring you don’t pay for unnecessary digging or repairs that don’t solve the core problem.
What is the difference between a suction leak and a pressure leak?
A suction leak occurs on the intake side, pulling air into the system and causing bubbles in the pump basket or “spitting” return jets. A pressure leak happens on the return side, where water is pushed out of the pipes into the surrounding soil. Both can lead to significant water loss. Our methodical testing process isolates these lines independently to determine which side of the circulatory system is compromised.
Do I need to be home for the pressure test to be performed?
You don’t necessarily need to be present as long as we have clear access to your pool deck and equipment pad. We prioritize transparency and can provide a digital report of the findings. However, many homeowners in Houston prefer to be home for the initial walkthrough to discuss specific observations, such as where they’ve noticed damp soil or sinking pavers. This helps us refine our diagnostic focus.
What happens if the pressure test shows all lines are holding?
If the pool plumbing pressure test shows that all lines are holding, it confirms your underground pipes are airtight and structurally sound. This result is valuable because it narrows the search to the pool shell, light niches, or equipment seals. We then pivot our focus to these areas using dye testing or structural inspections. This methodical process ensures we find the true source of water loss without overlooking simpler fixes.
Is air or water better for finding a pool leak?
Both have their place in a thorough diagnosis. Air is often better for creating the audible signal needed for sonic detection, while water is more stable for long-term pressure monitoring. In the shifting soils of Fulshear, we often use a combination of both. This hybrid approach ensures we catch slow-weeping leaks that might be missed by air alone while still pinpointing the exact location of the break for repair.