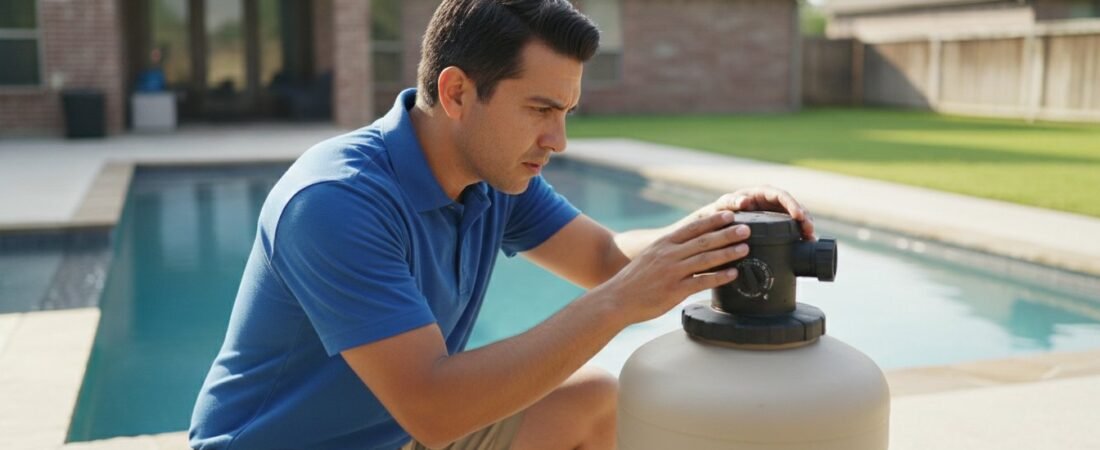
A small drip from your filter tank isn’t just a minor nuisance; it’s a structural warning that your pool’s filtration system is under significant stress. You’ve likely noticed sand settling on the floor of your pool or water steadily trickling from the waste line when it should be sealed tight. It’s frustrating to see your backyard investment lose its clarity. We understand that Katy homeowners value reliability and don’t want to waste time on superficial fixes that fail during a July heatwave. When you’re facing a pool sand filter repair, you need a methodical approach to ensure your water remains crystal clear and your equipment stays stable for the long term.
This guide provides a disciplined look at diagnosing the most common filtration failures. You’ll learn how to identify whether a leak is a simple gasket replacement or a more complex multi-port valve issue. We’ll also examine the cost-benefit of repairing older units versus investing in a full replacement to help you make an informed decision for your property. By following this step-by-step process, you can restore your pool’s health and maintain the high standards of safety and cleanliness your family expects. We’ll cover everything from lateral damage to tank integrity, providing the professional reassurance you need to manage your pool equipment with confidence.
Key Takeaways
- Identify the three primary failure points in your system to determine if a simple pool sand filter repair or a full component replacement is necessary.
- Recognize the specific symptoms of a failing spider gasket, such as water loss through the waste line, to stop unnecessary utility costs.
- Evaluate the safety risks of patching a pressurized tank and learn why structural integrity is non-negotiable for Katy homeowners.
- Learn the correct technique for removing calcified sand without damaging delicate internal laterals, ensuring your water stays debris-free.
- Implement a consistent backwashing and rinsing schedule to prevent channeling and maintain peak filtration performance throughout the swimming season.
Diagnosing Common Sand Filter Failures
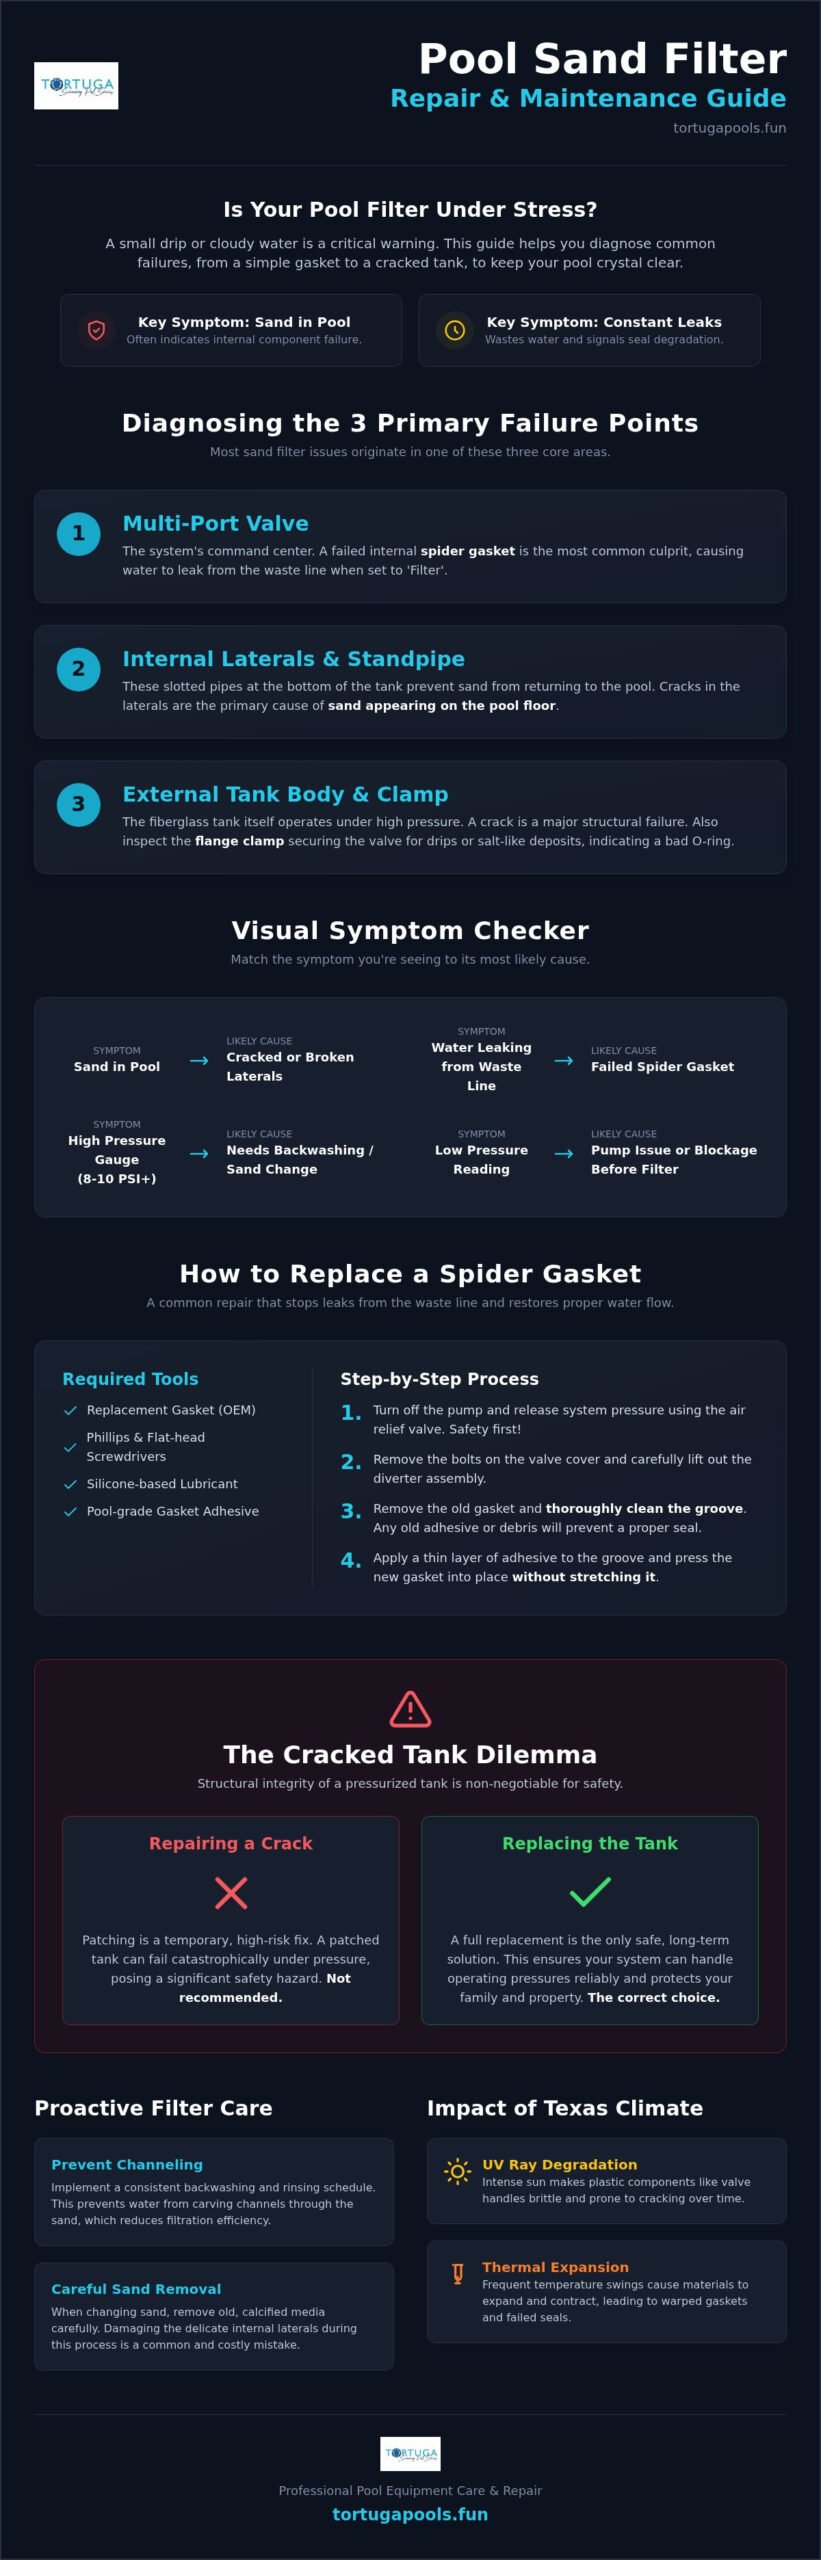
A swimming pool filter operates under constant pressure. Identifying the exact source of a malfunction requires a disciplined, step-by-step inspection. Most issues with a pool sand filter repair stem from one of three areas: the external tank body, the multi-port valve, or the internal laterals. Understanding Sand filter technology helps homeowners recognize that these systems rely on a delicate balance of pressure and flow. When that balance shifts, the symptoms are usually unmistakable.
Your pressure gauge is the primary diagnostic tool for internal health. A reading that stays 8 to 10 PSI above your clean baseline usually indicates a need for backwashing or sand replacement. Conversely, a low reading might signal an obstruction before the filter or a pump issue. If you see sand at the bottom of your pool, the diagnosis is almost always internal. These internal components, specifically the standpipe and laterals, must remain perfectly intact to prevent debris from returning to the pool water.
Visual Inspection and Leak Identification
Start with the flange clamp. This metal or plastic ring secures the valve to the tank. Look for salt-like deposits or active dripping. These signs suggest a failing O-ring or a clamp that has lost its tension. Next, check the sight glass and the waste line. If water flows through the waste line while the valve is set to Filter, the internal spider gasket has likely failed. Lateral failure is the primary cause of sand bypass and occurs when the internal slotted pipes crack, allowing filter media to enter the pool return lines. While a minor gasket leak is a routine fix, a crack in the fiberglass tank body is a structural failure that requires professional attention.
The Impact of Katy’s Climate on Filter Longevity
The Houston climate presents unique challenges for pool equipment. Intense Texas UV rays degrade the plastic used in valve handles and covers, making them brittle over time. Temperature swings in Katy also cause thermal expansion. As the materials expand and contract, seals can lose their seat and gaskets may warp. This environmental stress makes regular inspections vital. If you find yourself searching for professional pool repair near me, it’s often because the local heat has accelerated the wear on these critical components. We take a methodical approach to these repairs, ensuring every seal is verified and every component is rated for our specific environment.
Repairing the Multi-Port Valve and Spider Gasket
The multi-port valve acts as the command center for your entire filtration system. Inside this component lies the spider gasket, a wagon-wheel shaped seal that directs water flow between the filter, waste, and backwash ports. When this gasket fails, water often bypasses its intended route. You might notice water steadily trickling out of the waste line even when the valve is set to the Filter position. This isn’t just a waste of water; it’s a sign that your pool sand filter repair needs to focus on internal seals to prevent pressure loss and debris bypass.
Using manufacturer-specific parts is critical for maintaining a watertight seal. While generic gaskets might look similar, even a millimeter of variance can prevent the diverter from seating correctly. Gather these essential tools before you begin:
- Phillips head screwdriver
- Small flat-head screwdriver for prying
- Silicone-based lubricant
- Replacement spider gasket
- Pool-grade gasket adhesive
If you’re unsure where to start, you can troubleshoot sand filter problems by checking the clarity of the water in your sight glass during a backwash cycle.
Step-by-Step Spider Gasket Replacement
Before opening the valve, you must turn off the pump and depressurize the system by opening the air relief valve. Remove the bolts securing the valve cover and lift the assembly out. The old gasket may be glued in or simply pressed into a groove. You must clean this groove thoroughly. Any leftover adhesive or grit will prevent the new seal from seating correctly. Apply a small amount of specialized pool gasket adhesive to the groove, then press the new gasket into place without stretching it. Stretching the rubber creates thin spots that lead to premature failure. If the task feels overly technical, our team provides expert equipment repair services to ensure the job is done right the first time.
Valve Handle and Spring Maintenance
The Texas sun is particularly harsh on the plastic handles and springs of a multi-port valve. Over time, the spring can lose its tension, resulting in a floppy handle that doesn’t fully engage the diverter. Inspect the diverter’s plastic face for deep grooves or cracks. Even a perfect gasket won’t stop a leak if the diverter itself is compromised. Apply silicone lubricant to the O-rings on the diverter shaft to ensure smooth movement. This prevents the handle from seizing during the high-heat months when you need to backwash most frequently. A methodical approach to these small components prevents a total valve failure later in the season. Consistent maintenance ensures your pool sand filter repair lasts for years rather than weeks.
The Cracked Tank Dilemma: Repairing vs. Replacing
The hard truth about a pool sand filter repair is that the tank body itself is a pressurized vessel. When the fiberglass or thermoplastic shell begins to weep water through a hairline fracture, the structural integrity of the entire unit is compromised. Unlike a leaky pipe or a worn gasket, a structural tank crack cannot be safely patched with epoxy or resins. A filter tank often operates at 20 to 30 pounds per square inch (PSI). Under this level of stress, a superficial patch can quickly fail, potentially turning a temporary fix into a dangerous projectile. It isn’t worth the risk to your property or your family.
Distinguishing between a simple leak and a terminal failure requires a methodical eye. Sometimes, water pooling at the base of the unit originates from the drain plug. In many cases, this is merely a degraded O-ring or a cross-threaded cap, which is an inexpensive and straightforward fix. However, if the water is seeping directly through the housing wall, the material has reached the end of its service life. We always verify the source of the moisture before recommending a full replacement, ensuring you don’t spend money on new equipment when a minor seal would suffice.
Safety Risks of Pressurized Equipment
We prioritize the long-term safety of your backyard over temporary band-aid fixes. Identifying “spider webbing” cracks is a critical diagnostic step; these tiny, interconnected fractures signal that the tank wall is thinning and brittle. A ruptured tank is a major safety hazard for nearby family members. Because these systems hold hundreds of pounds of sand and water under constant pressure, a sudden failure can be catastrophic. We don’t take shortcuts with structural components because your security is our primary concern. If the tank shows signs of fatigue, a professional pool sand filter repair assessment will prioritize replacement for your peace of mind.
Cost-Benefit Analysis for Katy Homeowners
Investing in a new tank body often costs nearly as much as a complete filter system. When a filter reaches the ten-year mark, other components like the multi-port valve and internal laterals are likely nearing failure as well. It’s also common to find that signs of a failing pool pump coincide with filter stress, as an aging pump may surge or lose prime, putting uneven pressure on the tank. Choosing a professional swimming pool equipment installation ensures that your new system is sized correctly for your pool’s volume and flow requirements. This disciplined approach prevents future hydraulic issues and protects your investment for years to come.
Sand Replacement and Internal Lateral Maintenance
Sand filter media doesn’t last forever. Over five to seven years, the sharp edges of the sand grains wear down, and the media becomes “calcified” due to mineral deposits and body oils. This calcification creates channels where water passes through without being filtered, leading to cloudy water and high tank pressure. A methodical pool sand filter repair often involves a complete media change to restore filtration efficiency. We recommend using high-quality #20 silica sand or glass media, which provides superior clarity and resists clumping longer than standard alternatives.
The removal process requires patience. Using a shop vacuum is the most disciplined way to extract hundreds of pounds of old sand without jarring the internal components. Once the tank is empty, we perform a rigorous inspection of the standpipe and laterals. Even a hairline fracture in these plastic parts will allow sand to bypass the filter and enter your pool, turning a routine maintenance task into a recurring headache. If you suspect your system is failing, our team offers professional equipment repair to diagnose and resolve internal issues before they escalate.
Replacing Broken Laterals
If you find sand accumulating on your pool floor, perform the “bucket test.” Hold a clear container over a return jet; if sand collects in the bottom, a lateral has likely failed. Replacing these requires a steady hand. The laterals are designed to fold upward to fit through the narrow top dome of the tank. You must unfold them carefully at the bottom to ensure they are seated correctly. Centering the lateral assembly is vital; if it shifts while you are adding sand, the multi-port valve will not align with the standpipe during reassembly.
The ‘Water First’ Rule for Sand Loading
One of the most common mistakes in a DIY pool sand filter repair is pouring dry sand directly onto empty laterals. The weight of the sand can easily snap the plastic arms. You must fill the tank approximately 1/3 full of water first to provide a protective cushion. Before pouring, cover the top of the standpipe with tape or a specialized cap. This prevents sand from entering the plumbing lines, which would otherwise blow straight back into your pool upon startup. Once the sand is loaded, always run a full backwash and rinse cycle. This removes the “fines”, tiny dust particles found in new sand, before you return the system to Filter mode.
Professional Sand Filter Care and Maintenance
Backwashing is your first line of defense against poor water quality. This process reverses the water flow to flush out trapped debris and contaminants. It’s a simple task, but it must be followed by a rinse cycle to reset the sand bed. Skipping the rinse allows loose dirt to flow directly back into your pool. Regular maintenance prevents “channeling,” a condition where water carves narrow paths through the sand rather than filtering through the entire bed. When channeling occurs, your filtration efficiency drops significantly, and a pool sand filter repair technician may be needed to manually break up the clumps.
Consistency is the foundation of equipment longevity. Engaging in weekly pool maintenance in Katy, TX ensures your water chemistry remains balanced, which is vital for the health of your filter media. Imbalanced pH or high calcium levels lead to sand calcification, turning your filter into a solid block of stone. Once sand hardens, filtration stops. An annual deep clean using specialized acidic or alkaline solutions removes oils, lotions, and mineral scale that standard backwashing cannot touch. This proactive approach extends the life of your sand for the full five to seven year cycle.
While cartridge pool filter cleaning is a common requirement for many Houston area pools, sand filters remain a favored choice for their durability and ease of operation. You don’t have to manage delicate fabric pleats; you simply need to monitor your pressure gauge and maintain a disciplined backwash schedule. A well-maintained sand filter provides reliable, crystal-clear water with minimal mechanical intervention.
When to Call Tortuga Pools for Repair
Certain technical issues require the steady hand of a professional. Rebuilding a complex multi-port valve involves high-tension springs and delicate internal gaskets that are difficult to align without specialized tools. If you notice a rapid drop in water levels, you may be facing an emergency leak that requires immediate detection. We also provide professional equipment audits to verify that your filter is sized correctly for your pump’s flow rate. An oversized pump can force water through a sand filter too quickly, damaging the internal laterals and necessitating a pool sand filter repair.
The Tortuga Approach: Steady Reliability
We are methodical craftsmen who value quality and patience over speed. Our team treats your Katy property with the same diligence and respect we apply to our own homes. We don’t take shortcuts because we know that consistency is the key to a safe, healthy swimming environment. You can rely on our disciplined, step-by-step philosophy to protect your pool equipment for the long term. Contact Tortuga Pools for a professional equipment diagnosis today.
Restoring Your Pool’s Filtration Stability
Maintaining a clear pool requires more than just adding chemicals; it demands a functional and pressurized filtration system. We’ve explored how to diagnose the three main failure points and why structural tank integrity is non-negotiable for your family’s safety. Whether you’re dealing with a worn spider gasket or need a methodical sand replacement, addressing these issues early prevents total equipment failure during the peak of the Texas summer. A professional pool sand filter repair ensures that every seal is verified and every lateral is intact, protecting your backyard investment for years to come.
Tortuga Pools is a family-owned and locally operated business dedicated to providing expert equipment repair in Katy, Fulshear, and Houston. We understand the specific challenges our local climate places on your equipment. If you notice a sudden drop in water levels or sand returning to your pool, our emergency repair services are available for urgent leaks. We take a disciplined, step-by-step approach to every service call, ensuring nothing is left to guesswork. Schedule Your Methodical Filter Diagnosis with Tortuga Pools to restore your water clarity today. We look forward to being the steady hand that keeps your pool running smoothly.
Frequently Asked Questions
Can I use epoxy to fix a crack in my pool sand filter tank?
No, you cannot safely use epoxy to repair a structural crack in a filter tank. These tanks are pressurized vessels that typically operate under 20 to 30 PSI. A superficial patch is likely to fail under this stress, which can turn the filter components into dangerous projectiles. For the safety of your family and property, a cracked tank body requires a full replacement rather than a temporary fix.
Why is sand blowing back into my pool when the filter is running?
Sand returning to your pool usually indicates a broken internal lateral or a cracked standpipe. These components are designed to keep the sand inside the tank while allowing clean water to pass through. If a lateral snaps, the sand bypasses the filtration bed and enters the return lines. This issue requires a methodical inspection of the internal assembly and often a professional pool sand filter repair to resolve.
How often should the sand in a pool filter be replaced?
You should replace the filter sand every five to seven years. Over time, the sharp edges of the sand grains wear down, reducing their ability to trap fine contaminants. Additionally, mineral deposits and oils cause the media to calcify and clump together. This leads to channeling, where water passes through unfiltered, resulting in poor water clarity and increased system pressure that stresses your pump.
What does it mean if water is leaking from the waste line while filtering?
A leak from the waste line during the filtration cycle signals a failing spider gasket inside the multi-port valve. This gasket prevents water from crossing between different ports. When it becomes warped, brittle, or unseated, water bypasses the filter and escapes through the waste port. This leads to constant water loss and chemical imbalance. Replacing the gasket with a manufacturer-specific part is the most reliable resolution.
Is it cheaper to repair or replace a pool sand filter?
The decision depends on the age of the unit and the specific failure. Minor repairs, such as replacing a gasket, handle, or pressure gauge, are cost-effective. However, if the tank body is cracked or the unit is over ten years old, a full replacement is often the better investment. Modern systems offer improved energy efficiency and structural stability that older, repaired units simply cannot match.
How do I know if my sand filter laterals are broken?
The most obvious sign is sand accumulating on the pool floor near the return jets. You can verify this by performing a bucket test, where you hold a clear container over the jet to catch debris. If you find sand in the container, it’s a clear indicator of a cracked lateral. This requires emptying the tank completely to inspect and replace the damaged internal plastic arms carefully.
What is the correct pressure for a pool sand filter?
Most sand filters have a clean operating pressure between 10 and 15 PSI, though this varies based on your specific plumbing and pump strength. You must establish a baseline reading after a fresh backwash. When the pressure rises 8 to 10 PSI above that clean baseline, it’s time to backwash the system. Consistently high pressure indicates that the sand is likely dirty, calcified, or requires replacement.
Can I change the sand in my filter myself?
You can change the sand yourself, but the process is labor-intensive and carries technical risks. It involves removing hundreds of pounds of heavy, wet sand without jarring the delicate laterals at the bottom. If you accidentally snap a lateral while pouring new sand, you’ll have to start the entire process over. Many Katy homeowners prefer a professional pool sand filter repair to ensure the internal assembly remains centered and intact.