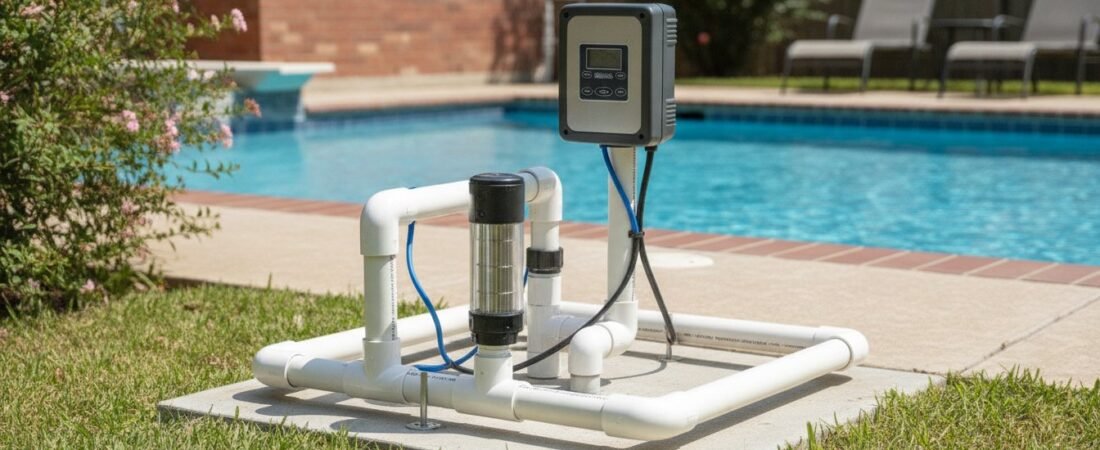
Precision matters more than speed when upgrading your pool’s sanitation. A salt water chlorinator is a complex instrument, and its success depends entirely on methodical sizing and disciplined electrical integration. Many Katy homeowners choose to switch to salt to escape the chemical roller coaster of manual chlorine additions. You likely want to move away from harsh smells and skin irritation, yet the technical demands of a salt water chlorinator installation can feel overwhelming. It’s natural to worry about improper plumbing or the complexities of electrical bonding in our Gulf Coast climate.
We believe your pool should be a place of steady, predictable relaxation. This guide outlines the exact technical requirements to ensure your system is installed with the accuracy it deserves for long-term health. You’ll learn how to navigate local requirements, verify electrical safety, and achieve a soft water feel that lasts for years. We will examine the step-by-step process of integrating the cell into your existing equipment pad. Our focus remains on the stability and endurance your family deserves for a safe, automated swimming experience.
Key Takeaways
- Understand why “oversizing” your salt cell is vital for the Katy and Fulshear climate to handle high evaporation rates.
- Learn the technical requirements for a safe salt water chlorinator installation, focusing on precise plumbing and proper electrical bonding.
- Master the “steady hand” approach to adding salt, ensuring you reach exact salinity levels without the risk of chemical imbalances.
- Identify the specific maintenance milestones, like the three-month cell inspection, needed to keep your automated system running efficiently.
- Transition from the chore of manual chlorine dosing to a reliable system that offers consistent sanitation and a gentler swimming experience for your family.
The Transition to Salt Water: Why Katy Homeowners Are Upgrading
In the peak of a Katy summer, your pool is a sanctuary. However, maintaining that water quality often feels like a second job. Many homeowners are choosing a salt water chlorinator installation to replace the manual chore of hauling liquid chlorine or handling pucks. There’s a common misconception that salt water pools are chlorine-free. In reality, these systems are simply chlorine-automated. They provide a steady, consistent stream of sanitizer that keeps the water clear without the drastic highs and lows of manual dosing.
A professional salt water chlorinator installation serves as a protective foundation for your entire equipment pad. It’s often a logical entry point for homeowners seeking professional pool repair near me, as it integrates modern automation with existing plumbing. A correctly installed system prevents the “harsh” feel of traditional chlorine pools, replacing it with a silky, soft texture that is much gentler on the eyes and skin during those 100-degree days.
How Electrolysis Works in Your Pool
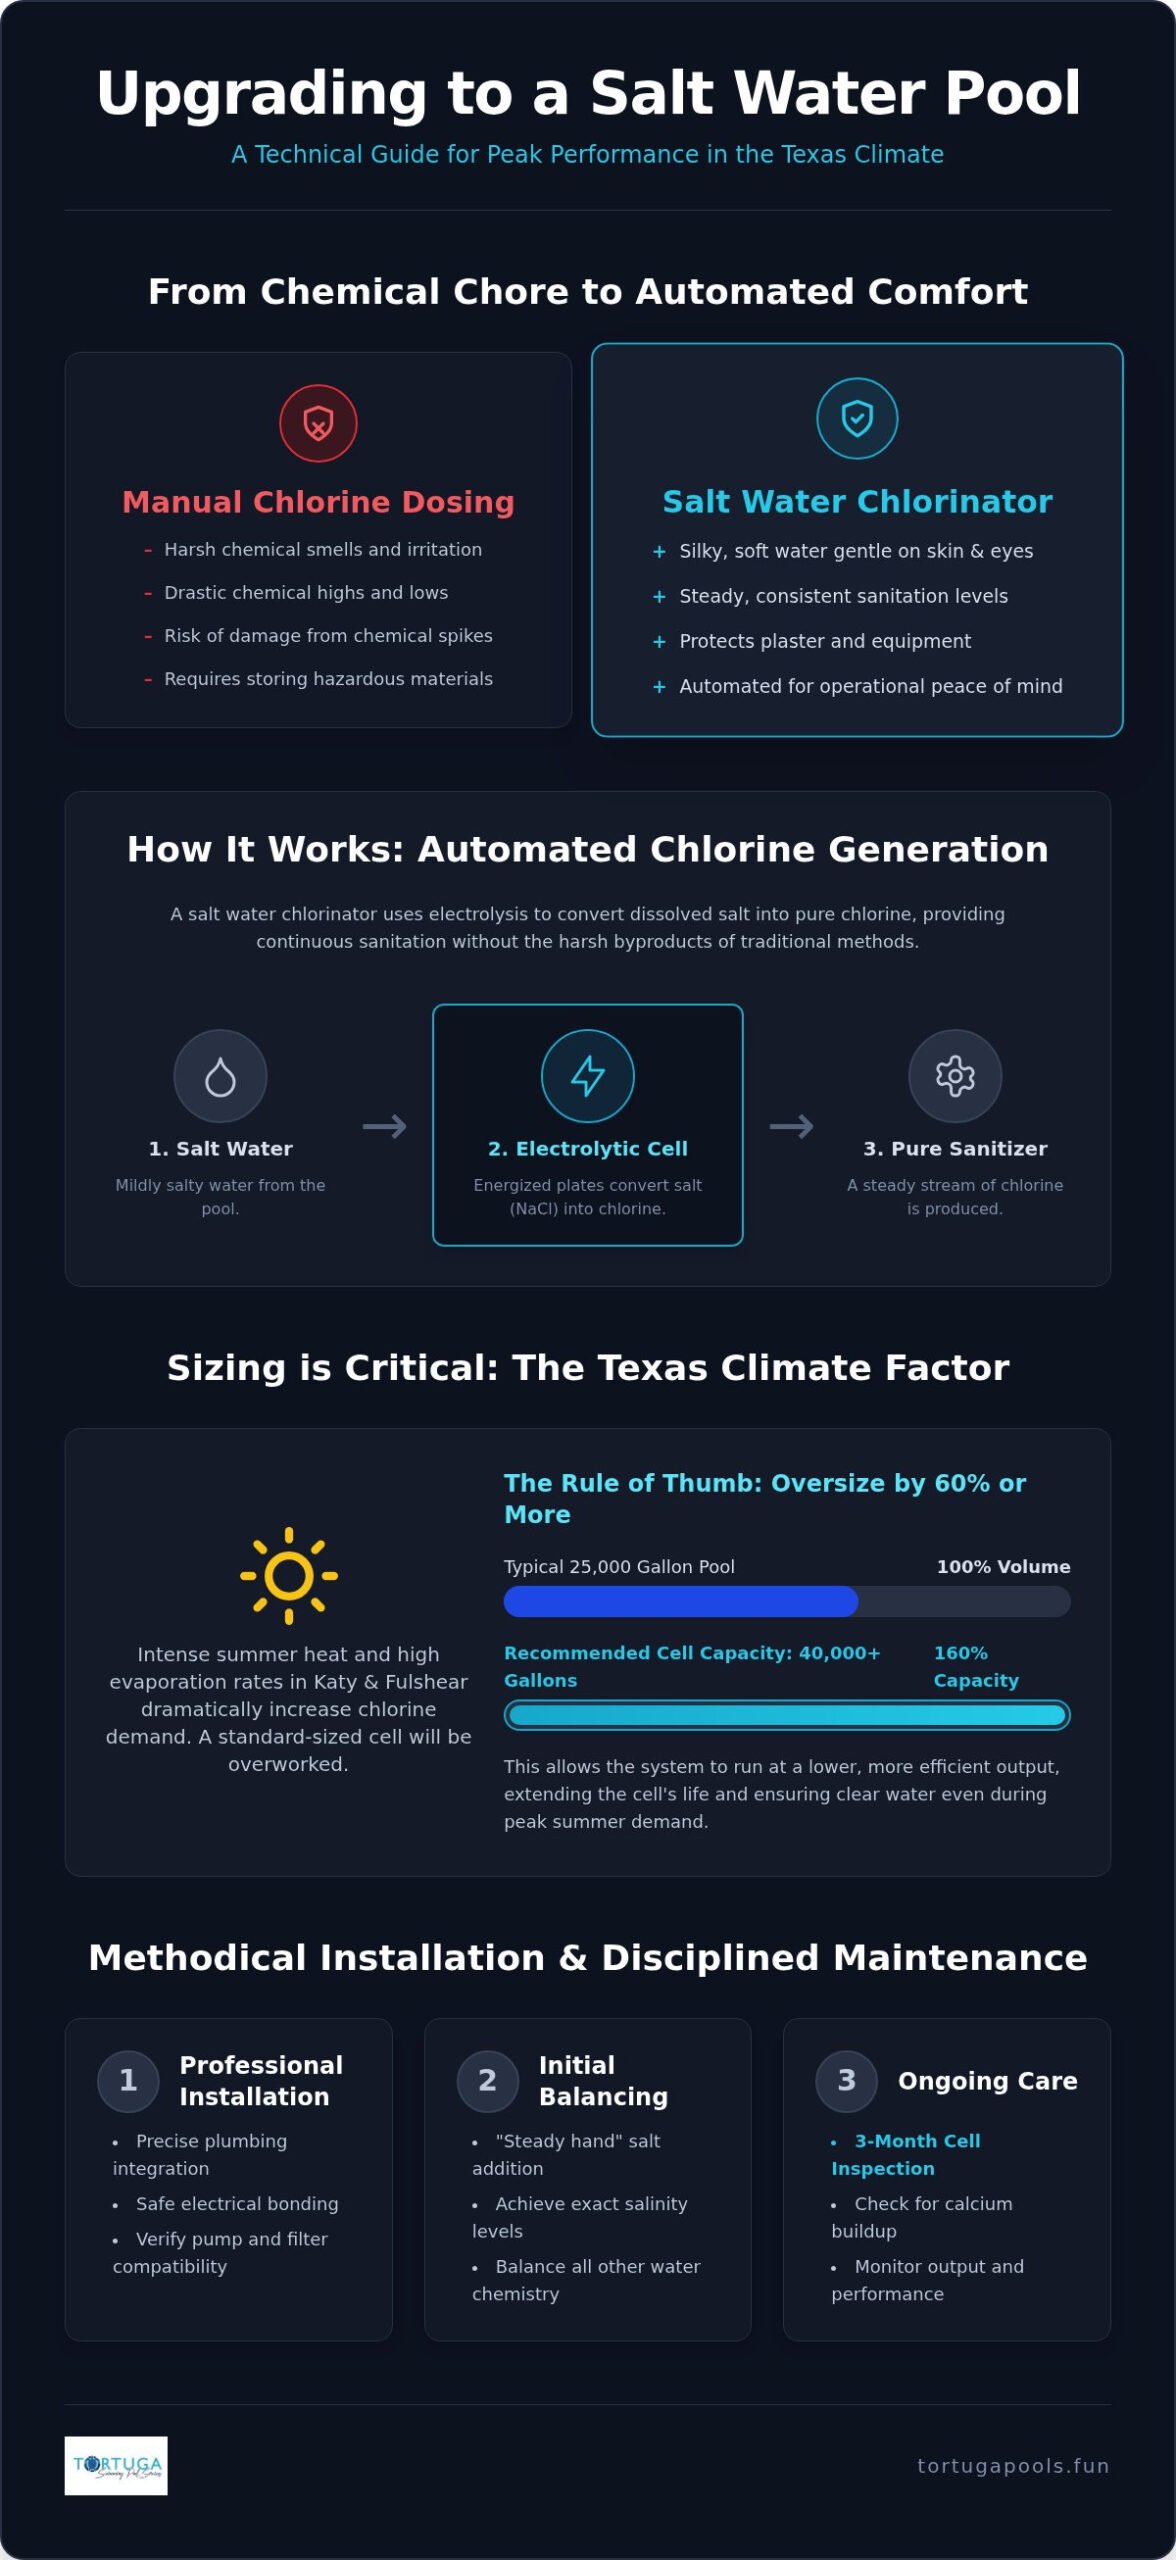
The electrolytic process in a pool involves passing salt water through an energized cell to convert dissolved salt into pure sodium hypochlorite for continuous sanitation. The salt cell acts as the engine of the system, generating a precise amount of sanitizer as water flows through the plumbing. Because the chlorine is produced and used immediately in a closed loop, it significantly reduces the formation of chloramines. These are the chemical byproducts responsible for that strong “chlorine smell” and eye irritation. With a salt system, you get the sanitation you need without the unpleasant side effects.
Long-term Protection for Your Pool Investment
Choosing salt is a protective measure for your property. It eliminates the need to store and transport hazardous liquid chlorine, which can be dangerous for families and pets. Beyond safety, automation provides a level of chemistry stability that manual methods can’t match. A steady sanitation level offers several endurance benefits:
- Finish Preservation: Constant chlorine levels protect plaster and pebble finishes from chemical spikes.
- Equipment Longevity: Stable water chemistry reduces the corrosive stress on pumps and heaters.
- Operational Peace: Modern systems operate with a quiet efficiency that respects your backyard’s tranquility.
It’s a disciplined approach to maintenance. This is a methodical upgrade designed for endurance and neighborly accountability.
Sizing and Selecting the Right Chlorinator for the Texas Climate
In the Katy and Fulshear areas, the relentless Texas sun dictates your pool’s chemistry needs. When planning a salt water chlorinator installation, we always recommend ‘oversizing’ the system relative to your pool’s total gallonage. A system rated exactly for your pool volume will struggle during a triple-digit August heatwave. The intense heat increases chlorine demand while high evaporation rates concentrate salt levels, forcing the cell to work harder to maintain sanitation.
Undersizing a salt cell in the Houston climate is a frequent error that leads to premature equipment failure and persistent algae blooms because the system cannot produce chlorine fast enough to counteract UV degradation.
Matching the chlorinator’s capacity to your existing pool pump and filter flow rates is essential for technical stability. If the flow is too low, the system’s safety sensors will prevent the cell from generating chlorine. If the flow is too high, it can cause unnecessary wear on the internal components. We prioritize a balanced approach that ensures every piece of equipment works in harmony.
Gallons vs. Demand: Calculating Your Needs
Calculating your needs requires more than a simple volume measurement. You must factor in bather load and direct sunlight exposure to create a realistic demand profile. For a typical 25,000-gallon pool in Katy, a cell rated for 40,000 gallons is usually the superior choice. This allows the equipment to run at a lower output percentage while still meeting sanitation goals. It preserves the life of the salt cell plates and ensures the water remains clear even after a heavy weekend of family swimming. If you are unsure about your pool’s specific capacity, a quick consultation for professional equipment installation can provide the precise measurements needed for a stable setup.
Compatibility with Existing Equipment
Your new hardware must function as part of a larger ecosystem. We verify that the control board integrates seamlessly with your existing pool automation for centralized management. Plumbing diameter is another critical check for a successful salt water chlorinator installation. A 2-inch pipe offers better flow than a 1.5-inch line, which is essential for the system’s flow switch to engage reliably. Placement is equally vital. The salt cell must be installed after the heater in the plumbing sequence. This prevents high concentrations of chlorine from damaging the heater’s copper heat exchanger, protecting your investment from internal corrosion.
The Methodical Installation Process: A Step-by-Step Breakdown
A successful salt water chlorinator installation isn’t about speed; it’s about a disciplined, checklist-driven process. At Tortuga Pools, we treat every equipment pad with the same meticulous care we’d give our own. This methodical approach ensures that every pipe cut is square and every wire is secured according to the highest safety standards. We follow a steady, step-by-step philosophy that prioritizes the long-term health of your pool over quick, superficial fixes.
The integration involves two primary phases: precision plumbing and technical electrical wiring. Each step requires verification to ensure the system operates as a cohesive unit. We don’t rely on gut feelings. We rely on measurement and testing. This industrious focus prevents common installation errors that can lead to leaks, electrical failures, or inconsistent sanitation levels in the future.
Plumbing the Cell for Maximum Longevity
The physical installation begins with identifying the optimal location in your plumbing line. We select a straight run of pipe, typically after the filter and heater, to ensure laminar water flow. This prevents turbulence that can interfere with the system’s sensors. Precision cutting is vital. We use professional-grade PVC primer and heavy-duty cement to create high-pressure bonds that withstand the Texas heat. The cell is positioned with unions that allow for a straightforward pool salt cell replacement Katy when the hardware eventually reaches the end of its service life. This forward-thinking layout prevents future plumbing re-dos.
Electrical Safety and Bonding Requirements
Wiring is where precision meets property protection. We mount the control center and wire it directly to the load side of your pool timer. This ensures the chlorinator only receives power when the pump is actively moving water. A critical step often overlooked in basic guides is the electrical bonding. We verify the system is properly integrated into your pool’s existing copper bonding grid. This step is essential to equalize electrical potential and prevent stray currents, meeting the strict electrical codes required in Katy and Houston. It’s a protective measure that prioritizes your family’s safety above all else.
Testing the Flow Switch and Sensors
The final phase involves rigorous verification. The flow switch acts as a primary safety device, preventing the cell from firing if water isn’t moving. Without this, hydrogen gas can build up, potentially damaging the cell or the surrounding plumbing. We calibrate the salt sensor to match the actual salinity of your water, ensuring accurate readings on the control board. We don’t consider the job done until we’ve verified every diagnostic light and confirmed the safety shut-off functions exactly as designed. It’s a steady, unhurried verification that builds trust in your system’s reliability.
Post-Installation: Balancing Salt and Stability
Once the physical salt water chlorinator installation is complete, the focus shifts from plumbing to chemistry. This transition requires a disciplined approach to ensure the water is hospitable for the new equipment. We begin by calculating the exact amount of salt required based on a professional salinity test, rather than relying on generic bag instructions. We use the “steady hand” method. This involves broadcasting the salt evenly across the deep end, followed by vigorous brushing to ensure every grain dissolves before it can settle.
Water balance is more critical in a salt pool than in a traditional chlorine setup. Because the cell naturally raises the pH as it generates chlorine, monitoring your levels becomes a weekly necessity. We also prioritize adjusting Cyanuric Acid, or stabilizer. In the intense Texas sun, stabilizer acts as a shield for your generated chlorine. Without it, UV rays would destroy your sanitizer faster than the cell could produce it. A methodical salt water chlorinator installation concludes with this stabilization phase, ensuring your equipment pad and pool finish remain protected.
The First 24 Hours: Startup Protocol
The initial day of operation follows a strict sequence. We keep the pool pump running continuously for at least 24 hours while the salt cell remains powered off. This allows the salt to fully integrate without passing through the energized plates of the cell. You must avoid letting salt sit at the bottom of the pool. Undissolved salt can cause pitting or staining on plaster and pebble finishes. During this window, we perform a baseline water test for pH, Total Alkalinity, and Calcium Hardness to establish a stable environment for the system.
Managing Calcium Hardness in Katy Water
Katy’s local water supply is notoriously high in minerals. This hardness presents a specific challenge for salt cells, as calcium tends to crystallize on the energized plates, forming scale. Maintaining a precise pH level is the most effective way to prevent these “snowstorm” scaling events. While many homeowners rely on DIY test strips, professional-grade testing is superior for a successful startup. It provides the accuracy needed to protect your hardware from the start. If you want to ensure your water chemistry is managed with this level of precision, consider our weekly cleaning and maintenance service.
Protecting Your Investment with Disciplined Maintenance
A professional salt water chlorinator installation provides the hardware for a superior swimming experience, but its longevity depends on a disciplined routine. The equipment pad requires consistent attention to prevent minor issues from becoming costly repairs. Integrating your system into a weekly pool maintenance Katy TX schedule is the most effective way to protect this investment. We focus on a three-month inspection cycle where the salt cell is physically removed and checked for calcium deposits. This interval is specifically chosen to counteract the high mineral content found in our local water supply.
We also monitor the sacrificial anode during these regular inspections. This small but vital component prevents galvanic corrosion, which can otherwise damage metal pool parts like ladder anchors or light niches. With professional oversight, your salt system can realistically achieve its full five to seven-year lifespan. Without this methodical care, the delicate coating on the cell plates often degrades prematurely. This leads to a loss of efficiency long before the hardware should actually fail.
The Importance of Regular Cell Cleaning
Signs of scaling are usually technical rather than visual. You might notice low chlorine readings despite high output settings, or the control board may trigger “low salt” alerts even when salinity is within the correct range. When scale is present, we use a methodical acid-washing process to restore the cell’s efficiency. It requires a precise ratio of water to muriatic acid. Accuracy is essential. Over-cleaning the cell with acid can strip away the rare metal coating on the plates, which is just as damaging as neglecting the buildup entirely. We prioritize a “just enough” approach to preserve the hardware’s integrity.
Seasonal Adjustments for the Houston Climate
Your sanitation needs change as the temperature shifts. During the cooler winter months, we lower the generation percentage to prevent over-chlorination, which can be hard on pool finishes. Conversely, we boost output during the peak of Houston’s “Algae Season” when high temperatures and heavy rains put the most stress on your sanitizer levels. Tortuga Pools manages these transitions for local homeowners to ensure the system is always tuned to current environmental demands. This industrious approach keeps your water clear and your equipment pad stable throughout the year. A salt water chlorinator installation is most successful when it’s supported by this type of steady, expert hand.
Achieve Lasting Pool Health and Clarity
Transitioning to a salt system is more than an equipment swap. It’s a commitment to a more stable, automated backyard environment. By prioritizing correct sizing for our local climate and ensuring meticulous electrical bonding, you protect both your family and your property. This methodical approach prevents the common failures that occur when systems are rushed or undersized. A professional salt water chlorinator installation serves as the foundation for years of gentle, clear water.
Tortuga Pools is locally owned and operated in Katy, TX, and we take pride in being the steady hand for our neighbors. Our process emphasizes expert equipment diagnosis and installation to ensure your system integrates perfectly with your existing pad. We provide methodical, protective care for your property, treating every pool with the same diligence we’d give our own. If you’re ready to move away from the frustration of manual chemical dosing, we’re here to guide you. Request a Professional Salt System Consultation from Tortuga Pools to ensure your upgrade is handled with precision. Your pool is a sanctuary. Let’s keep it that way.
Frequently Asked Questions
Is it better to hire a professional for salt water chlorinator installation?
Hiring a professional for salt water chlorinator installation is highly recommended to ensure the system meets local Katy electrical codes and plumbing standards. A methodical expert verifies that the equipment is properly bonded to your pool’s copper grid, which is a critical safety step often missed in DIY projects. Professionals also handle the precise pipe cutting and high-pressure bonding required to prevent leaks, protecting your equipment pad from long-term damage.
How much salt does a pool need for the initial setup?
Most pools require approximately 30 to 40 pounds of salt for every 2,000 gallons of water to reach the target salinity of 3,200 parts per million. However, the exact amount depends on your pool’s current salt level, which we verify with digital testing before adding any product. We use a “steady hand” approach, adding salt in stages and brushing it thoroughly to prevent plaster staining. This disciplined method ensures you don’t over-salt the water.
Can a salt water chlorinator be installed on an existing pool?
A salt water chlorinator can be installed on almost any existing pool as a retrofit upgrade. The process involves cutting into the return line after the filter and heater to mount the salt cell. We also install a control box near your existing power center to manage the system’s output. It’s a straightforward way to modernize your sanitation system without needing a full pool renovation or expensive structural changes to your property.
Will the salt water damage my pool equipment or stone coping?
Salt water is generally safe for pool equipment and stone coping if the water chemistry remains balanced and a sacrificial anode is installed. The anode protects metal components from galvanic corrosion by attracting the electrical current that would otherwise target your heater or ladder anchors. For porous stone coping, we recommend regular rinsing with fresh water and applying a high-quality sealer to prevent salt crystallization from weakening the stone over time.
How long does the salt water chlorinator installation process take?
The physical salt water chlorinator installation typically takes between two and four hours to complete. This includes the plumbing of the cell, mounting the control center, and completing the electrical wiring. After the hardware is in place, the pool must circulate for 24 hours to fully dissolve the salt before the system is powered on. This steady, unhurried timeline ensures every connection is secure and the water chemistry is stable for startup.
Does a salt water system mean I never have to buy pool chemicals again?
A salt system automates chlorine production, but it doesn’t eliminate the need for other pool chemicals. You will still need to monitor and adjust your pH, Total Alkalinity, and Calcium Hardness to protect your pool’s finish. Because salt cells naturally raise the pH level, you’ll likely need to add muriatic acid more frequently than before. Additionally, maintaining a proper level of Cyanuric Acid is vital to keep the generated chlorine from burning off in the sun.
What happens to the salt system during a Texas freeze?
Most salt cells stop generating chlorine when water temperatures drop below 50 to 60 degrees Fahrenheit. During a Katy freeze, the system’s sensors will likely trigger a “low temperature” shutdown to protect the cell plates. It’s essential to keep your pump running to prevent water from freezing inside the plumbing. We recommend switching to manual chlorine additions during the winter months to maintain sanitation while the salt system is in its protective dormant state.
How often should I have my salt cell professionally inspected?
We recommend a professional inspection of your salt cell every three months. During this methodical check, we remove the cell to look for calcium scale buildup on the internal plates. If scale is present, a disciplined acid wash is performed to restore efficiency without damaging the delicate metal coating. Regular inspections ensure the system operates at peak performance and helps the hardware reach its full expected lifespan of five to seven years.